Whilst researching Low Polygon artists, I stumbled across some work by Timothy J. Reynolds which creates animal figures in Cinema 4D using a low poly technique. By creating this in Cinema 4D, the lighting and background of the artwork can be adjusted to help give the impression that the objects are made of out origami or are sculpted in real life.

Rather than approaching this technique from a 3D perspective, I initially decided that I would attempt the Low Poly style in Adobe Illustrator so that I might better understand the basics of the style instead of relying on guesswork and so I might use colour to achieve an entirely 2D aesthetic to my low poly work.
I also noticed that the more detail in that part of the artwork, the more triangles were apparent, helping define that shape amongst all of the generally vague shapes.
In Adobe Illustrator, I imported and placed an image of a velociraptor from Jurassic Park as the photo I would be working from.
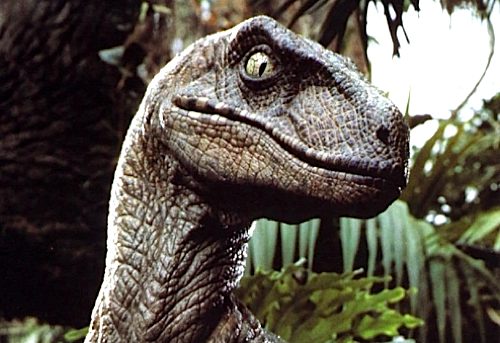
From here I decided to identify the areas of more detail so that I could remember where needs more shapes. In this instance it was around the Eye and the Mouth of the velociraptor.
Creating a new layer, I was now ready to create the triangular "mesh" over the top of the photo.
Using the pen tool, I created triangles around the edge of the velociraptor so that its shape could be distinguished and created larger triangles where large patches of colour appeared.
With a basic idea of where the detailed areas would need to be, I zoomed in on the eyes and the mouth and repeated this technique on a smaller level, creating a complete "mesh" which now just needed to be coloured.

From this point, I selected each triangle and used the eyedropper tool to select a colour from the photo behind it, ensuring that the colours look fine when placed next to each other and giving an impression of the original image.
Finally to make sure that no points on the image where missed, I gave the piece a coloured background.

With the way I created this piece relying mainly on the basic colouration of the velociraptor, I decided that I would try this same technique on a larger more complex image using smaller triangles to retain the level of detail. For this attempt I used this image of a snarling tiger.

Although creating the "mesh" for this piece was more complex and took significantly more time, the end result was how I had expected it to be and it proved that the method I used was solid.

The colouring up on this piece also took significantly more time as coordinating the colours was more difficult due to the fact there was more variation and some of the detailed areas were out of focus in the photo. If I was to redo a piece of work like this, I would make sure that all parts of the photo were in focus.

After creating this tiger image, I realised that if the image was brought into a software such as Adobe Photoshop, I could adjust the Hue/Saturation of the image to get a variety of colours which would be incredibly difficult to create in my normal method.


No comments:
Post a Comment